Total Pageviews
Contact Me
T.O.U.
T.O.U.
All things I provide on this blog are of my own creation.
Any resemblance to others is strictly coincidence.
Please do not share.
Do not claim as yours.
If you use any items here please link back to my blog.
DO NOT ADD NAMES TO MY SNAGS/EXTRAS AND CLAIM AS YOUR OWN!
Most of them are on always lists anyway so if you want your name on them join one or just email me and I will do it for you.
I have a list of places where I currently have an always list on side of the blog.
I update the list of sites every month depending of where I'm offering.
So if you want my tags you can pick one and join.
No translations of my tutorials.
Feel free to send me anything that you make with my stuff and I will gladly showcase it. My email is latinplayachick@gmail.com
Sunday, May 18, 2014
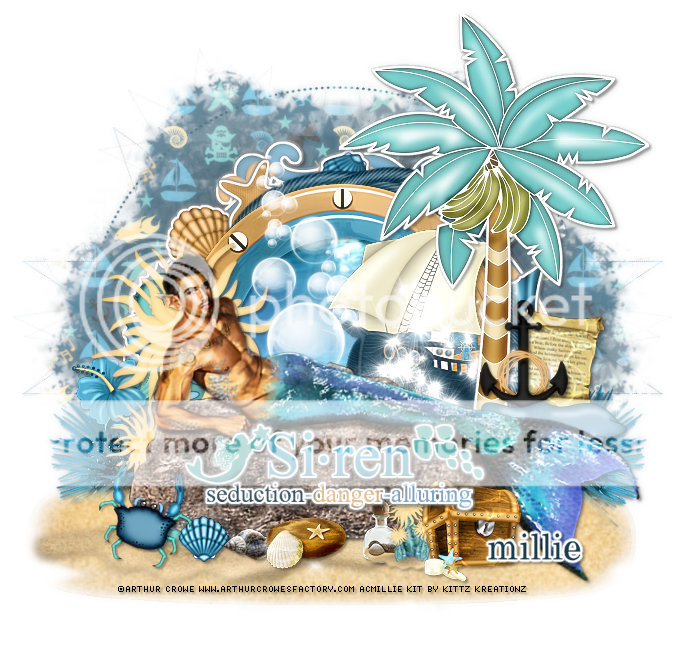
*click on image to view full size*
FTU Alluring Merman
This tutorial was written by me on May 18, 2014.
It was made out of my own creation and any similarity is purely coincidental.
I used pspx5 but any version should work without problems.
If you're doing this tutorial you must have good psp knowledge and be familiar with the tools.
Let's get started!
Artist: Merman by Arthur Crowe
Scrapkit: Sea Siren by Kittz Kreationz
Mask: 45 by me HERE
Font: New Century Schoolbook
*open your mask and minimize in your workspace*
c/p = copy and paste, ds = drop shadow
File - New - 700x700 - flood fill w white
Open 30 - resize by 75% - sharpen - move to right a little - ds
Open 19 - c/p as new layer - ds
Click inside 19 w magic wand - expand by 15 - new layer
Open pp4 - c/p into selection - move under frame - deselect
Go on 19
Open 4 - resize by 50% - c/p as new layer - ds
Open 49 - resize by 50% - sharpen - place to left - ds
Open 46 - resize by 50% 2x - sharpen - place to the right rotate a little bit
Open 25 - resize by 50% - sharpen - place to right - ds
Open 39 - place to the right - ds
Open 53 - place to the right - ds
Open 57 - resize by 50% 2x - sharpen - place to the right - ds
Open 26 - place to the right some - ds
Open 23 - place to the left - ds
Open 27 - move to the left some - ds
Open tube - resize to liking - c/p as new layer - place down some
Open 3 - resize by 50% 2x - sharpen - place to the bottom
Open 14 - resize by 50% 2x - sharpen - place to the bottom
Open 51 - resize by 50% - place to bottom - ds
Open 48 - resize by 50% 2x - sharpen - place to the bottom left - ds
Open 24 - resize by 50% 2x - sharpen - place to the bottom left - ds
Open 1 - resize by 50% 2x - sharpen - place to the bottom left - ds
Open 43 - resize by 65% - place to bottom - ds
On background layer
Click on background with magic wand - new layer
Open paper5 - c/p into selection - deselect
Layers - New mask layer - From Image
Find your mask in source window - hit ok
Merge group
Change mask opacity to 69
Open 15 - place to bottom left - ds
duplicate 15 - mirror
Open 50 - resize by 85% - place to the bottom - ds
Delete background layer - merge visible
Adjust - Brightness and Contrast
Local Tone Mapping - strength 3.0 - Block Size 14 - hit ok
Add credits and name
Subscribe to:
Post Comments
(Atom)


going to have to try this out
ReplyDelete